Article Type | How-to |
Applies To | CISCO Credit web portal |
Last Updated | June 30, 2026 |
Purpose
This article explains how to add or edit the default credit card saved to a CISCO Credit web portal account.
Procedure
- Log in to the CISCO Credit web portal: https://credit.ciscocredit.com/custom/login.aspx
- On the Main Desktop, under Preferences & Announcements, select My Account.
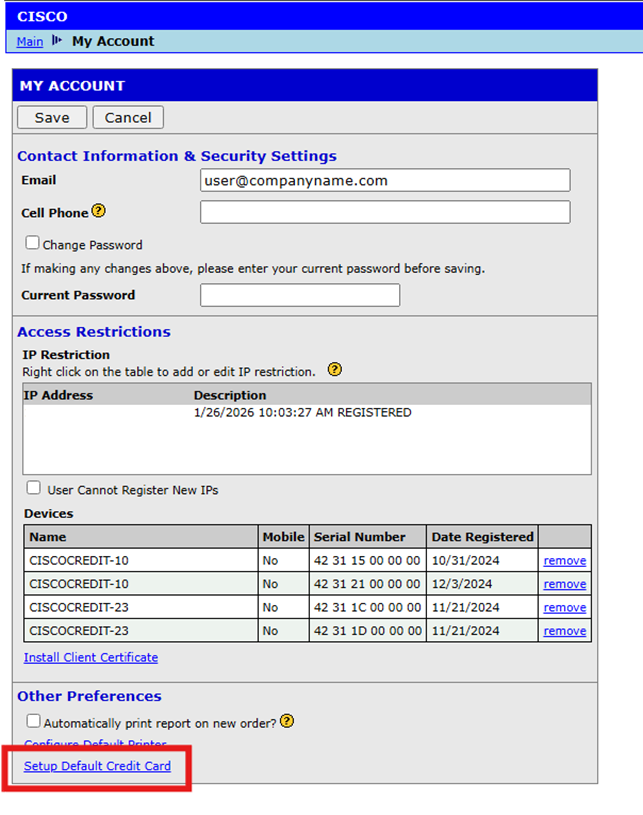
- On the My Account screen, select Setup Default Credit Card.
- Enter the cardholder's name, street address, city, state, ZIP code, credit card number, expiration month, and expiration year.
- Click Save.
Screenshots
Figure 1: From the Main Desktop, select My Account under Preferences & Announcements.
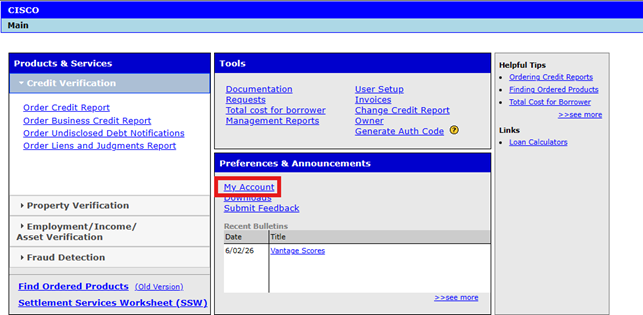
Figure 2: From the My Account screen, select Setup Default Credit Card.
Result
The default credit card is saved to the account and will be used as the default payment method when applicable.
Additional Notes
- Confirm that the billing address matches the address associated with the credit card.
- When editing an existing default card, review all fields before saving.
- If the card does not save, verify that all required fields are complete and that the card number and expiration date are entered correctly.
Follow this link for more CISCO Credit Knowledgebase articles.
Was this article helpful?
That’s Great!
Thank you for your feedback
Sorry! We couldn't be helpful
Thank you for your feedback
Feedback sent
We appreciate your effort and will try to fix the article